Thursday, September 22, 2016

Finally over the procrastination and planning

My favourite quilting retreat space
Life is good! I spent the first evening of my quilting retreat, starting this post while sipping a gin and tonic, and enjoying the rewards of a day spent working on my Art with Fabric piece.

In last week's post, I was procrastinating by planning my project. Although it was procrastination, it was well worth it. I was able to figure out roughly how to tackle this project.
Art with Fabric blog hop


I received all of the fabrics that I ordered. Look at these beautiful colours! If you want to enhance your stash, try making a multi-coloured stained glass window! I got the Kona cottons from Mad About Patchwork and some lovely Whisper Whites - Ultra Whites from Flare Fabrics. After washing everything, I had no excuses left!

This fabric rainbow makes me happy :-)


It was time to start. I brought my supplies downstairs to the kitchen table and made my calculations for the project based on my submission to the Colour Unboxed fibre art exhibition. The final size will be 30" by 40" (ish). Bigger than my usual art quilts but small enough to be manageable on my machine. Anything bigger and I'll need a large studio!

Supplies for drafting the window

I started drafting the stained glass window on freezer paper; the circular part at the top of the window and then the next four rows of colour. It took me a few hours but since I had practiced drawing and colouring it, this part went fairly quickly.

The first two rows drafter onto freezer paper


Once finished, I hung the draft in front of our French windows to photograph. I sent the entire plan to my girlfriend who is a stained glass artist. I'm happy to say that there was only one minor adjustment to make. Of course, I'm adjusting as I'm making the quilt, but at least I know that I'm following proper stained glass principles.

Draft of the stained glass window pattern on freezer paper
If you're not familiar with the properties of freezer paper, let me enlighten you! I imagine it must be good in the freezer, but it's amazing for quilting. You draw on the flat side, cut out the image from the freezer paper and the iron the shiny side to your fabric. This project would be much more difficult without freezer paper!

I started by numbering all of the pieces in the first section and then cutting them. Before ironing the pieces to the fabric, I take a picture so that I can put the puzzle back together again.

The pieces are cut and will eventually be ironed to the fabrics

The pieces are put back in order 
I completed the top circular part of the window before leaving for the retreat. Since I want the background to represent the sandstone wall, I added the brown behind the circular piece before placing the stained glass pieces. The sides will be easy to add because they're straight, but I really didn't want to add the circular part afterwards. It's important to keep the potential complications to a minimum!

Choosing, cutting and placing the fabrics
I continued the process with the second row, learning as I went along (you can read about this below). At the retreat, I have a small table where I cut and piece my fabrics. You can see my IPod in the background. That were I check to make sure that I'm putting the puzzle back together properly.


I work in sections. Now all the pieces have been cut and are ready to be placed.

When I finished sections 1 and 2, I took out the ruler to make sure that I'm still on track. Yikes - it looks like I have some minor adjustments to make at the bottom of row 2. It's OK if the pieces are too long since they can be clipped or covered, but too short is not an option.

Rows 1 and 2 
Since I'm making this up as I go along, I just kept at it. Now my stained glass has two new pieces.

What I learned:

  • I was thrilled when I stopped procrastinating and finally started the project. Why, oh why do I keep doing this?
  • The quilting retreat was a last minute thing. The Universe provided when I needed it! Thank you. I am very grateful :-)
  • For the first circular row I just placed and sewed the fabric directly on my background. I found it slightly hard to manage.
  • For the beginning of the second row, I put a little bit of Heat and Bond Light at the back of my fabric. That helped but I needed more of it.
  • By the end of the second row, I was on a roll. I still don't cover my entire piece with Heat and Bond Light but I put more on and this definitely helps.
  • At about the middle of the second row, I realized that my pieces were getting bigger because I was adding an eight to a quarter of an inch but not butting the pieces together. Good thing I figured that out before I ironed them all down.
  • It's tricky putting these together because you don't want to have spaces between the pieces but you don't want too much overlap. I'm now cutting the left side on the pattern line but adding the extra fabric to the right side so that the next piece will overlap. I just have to adjust this occasionally because the pieces are all different shapes.
  • I'm finding it hard not to make the pieces all perfect and attacking the fraying threads. I need to remind myself often that I will be covering the seams with something to represent the lead cane. Since I still have a lot of work to do on this quilt, the fraying will get worse....so just leave it!!!

I have to get back to the third row now. I hope to post something in the next few days on my progress.

Check out what everyone is doing through these linky parties: Let's Bee Social, Midweek Makers, Needle and Thread Thursday, MOP Monday, Off the Wall Friday, Can I get a Whoop Whoop? Main Crush Monday, Linky Tuesday, Fabric Tuesday,


Monday, September 12, 2016

Art with Fabric Blog Hop Coming

Art with Fabric blog hop 
Have you ever had an amazing idea for a project that scares the hell out of you? I know that this is a good thing, because it means that I’m stretching myself as an artist, but it’s still painful to go through.

To minimize the anxiety (and justify the procrastination), I’ve done a few things:
  • I did my homework so that I’m comfortable with the subject matter;
  • I’ve drawn several drafts with various amounts of detail;
  • I’ve gone through my fabric and purchased lots more;
  • I’ve written out the process I’ll use so that I know how to tackle the project; 
  • I’ve even sewn with some of special thread I’ll be using to get used to it (more on this below) and now…
  • I have to get off my butt and START!
This post is as much about convincing myself as it is another procrastination technique :-)

I can hear you ask….So what’s the project? It’s another Art with Fabric blog hop hosted by the wonderful Alida. As if my last project wasn’t ambitious enough, this time I’m not just outside the box, I feel like I’m floating (or hanging) 10 feet above it! Here’s a hint: it’s based on the amazing Sagrada Familia Church in Barcelona, Spain.
Passion Facade - Sagrada Familia
If you’re not familiar with this architectural marvel, check out their website. I’ve been lucky enough to visit it twice. I have to admit that it wasn't love at first sight. When I first saw it, I felt like I was walking onto a sci-fi movie set designed by someone on an LSD trip! I've grown to love it, but what won me over is the inside. WOW!!!

Here are some of the potential fabrics I've taken out for the project. As you can see, these are all solids. It would seem that I have lots of blue, green and red (pink) fabrics in my stash. I had to order some yellow and orange.
Mostly blue and green fabrics
Reds and a bit of yellow and orange fabric
Reds and what little I have of yellow and orange fabric
What could require these colours within the Sagrada Familia? If you guessed the stained-glass windows, you are correct!
Stained glass windows

Stained glass windows and pillar
So what makes this project so out of the box for me? There are many things such as:

  • The size – I’ve decided that it will be roughly 30” by 40” – much bigger than my usual art quilts.
  • The fabric – I haven’t made many projects all in solids.
  • The subject – although it's based very loosely on elements found within the Sagrada Familia, it’s very much my representation.
  • The commitment and my expectations – this project is primarily for the Art with Fabric blog hop but I’m really hoping that it will be accepted for the Colour Unboxed fibre art exhibition that will be help at the Mississippi Valley Textile Museum with Out of the Box Fibre Artists. This is an amazing opportunity – but it's adding to the pressure that I feel already.

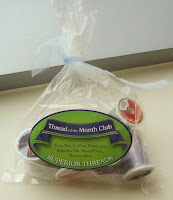
Package of Kimono Silk thread
This is the lovely package I receive each month
I plan on doing a lot of free motion quilting in the windows. For this, I will be using mostly Kimono Silk thread from Superior Threads. For the last 4 months I have treated myself - I receive 6 spools of Kimono Silk thread in their Kimono Thread of the Month Club. The silk thread is very fine. #100. It's absolutely wonderful for FMQ that blends into the background. I am planning on using Superior Threads' Bottom Line, which is a #60, for the bobbin. They really work well together.

Kimono Silk threads - better for you than candy!
What I've learned:
  • I do this every time I have a big project (one that scares me) to do. I will procrastinate till I have such a tight deadline that I'll have no choice but to start and be stressed out.
  • At least I know that once I actually start, in theory, it shouldn't be too rough. 
  • I am really looking forward to the FMQ part - but I will make an effort to enjoy every step of the project.
  • Please come back to check on my progress. Being accountable will help me move forward.

I have linked this post to the following Linky Parties. Please check out everyone's work. MOP Monday, Monday Making, Main Crush Monday, Linky Tuesday, Fabric Tuesday, Let's Bee Social, Midweek Makers, Needle and Thread Thursday. Off the Wall Friday


Tuesday, September 06, 2016
Textile and Colour Intermission


In between projects, I took a trip this weekend with my family. It was filled with colour, textiles and good food with family – all the best that life has to offer!
Chihuly Exhibition at the ROM in Toronto


The Royal Ontario Museum (ROM) in Toronto has an amazing exhibition of glass by Chihuly (until January 2, 2017). It’s a symphony of light, colour and form. I’ll let you judge for yourself!

This is the first installation you see as you come into the exhibition. It may look like a bowl of glass beads in this photo but it’s actually a full-size boat filled with glass balls. Wow!


This is one of my favourites. It’s a glass ceiling filled with translucent glass shapes of myriad colours. They actually have mats on the floor for visitors to lie down and look up at the ceiling – which is how this picture came to be.
A truly beautiful glass ceiling by Chihuly

Reflected light from the glass ceiling by Chihuly
Reflected light from the 
glass ceiling by Chihuly
The reflected light is almost as beautiful as the light coming through the glass.

One of the calmer pieces is a row of old images of first nation people and a representation of glass baskets beneath them. Stunning.
Glass bowls by Chihuly based on Aboriginal baskets
Glass bowls by Chihuly based on Aboriginal baskets 


Toronto is also home to the Textile Museum of Canada. This weekend they had two exhibits - Bliss: Gardens Real and Imagined (until September 18, 2016) and Worlds on a String: Beads • Journeys • Inspirations (until October 23, 2016)

Original fabric designed by William Morris
Bliss explores flowers and gardens in textiles throughout history while the Worlds on a String explores the history and significance of beaded objects.  My favourite exhibition was the garden and flower themed textiles. Since I’m a huge fan of the Arts and Crafts movement and William Morris, it was great to see the original fabric designed by Morris.


The colours are particularly tranquil and muted after the Chihuly exhibit.
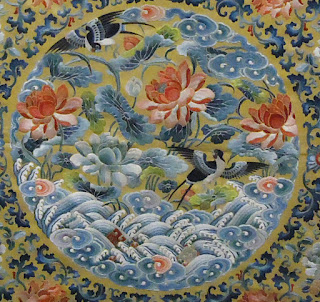
Silk embroidery from China


Here is a beautiful embroidered piece from China.


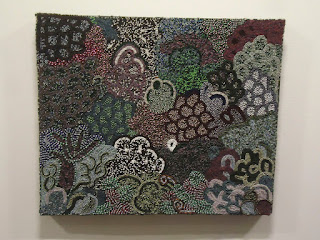
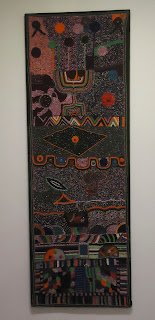
Last but not least is the Worlds on a Bead exhibit. There were many beaded objects from all over the world, but I was struck by the colours and composition of these pieces by Ubuhle Beautiful Beads, a beading community established in rural KwaZulu-Natal, South Africa.
Beading by Ubuhle Beautiful Bead
Beading by Ubuhle Beautiful Beads

Beading by Ubuhle Beautiful Bead


What I learned:
  • My daughter just finished a course on the history of modern architecture. She took me through the ROM’s gallery of The legacy of European style through the ages (from the Middle Ages to the 20th century). Since I quizzed her for her mid-term and exams, it was great to see for myself the differences between Renaissance, Baroque, Rococo, Neoclassical, and Victorian periods in different countries.
  • When looking for a particular location in downtown Toronto, it’s important to get more than the street address – I missed the Textile Museum by one block and got very frustrated and hot. The upside – I found the wonderful Mi Taco Taqueria on Queen Street West. I love eating home-made foods from around the world! 
  • There are drawbacks to visiting more than one museum in one day. I was both hot and tired when I arrived at the Textile Museum. I took many photos since I knew I would appreciate them more when I was rested.

I've linked this eye candy post to the following links: Off the Wall Friday, MOP Monday, Monday Making